
John Doe
Monday, June 8, 2020
Deploy site in Netlify
Netlify offers an excellent and easy process for deploying hugo static site. You can deploy your site in matter of few clicks. Unlike Github Pages, you can name your repository whatever you want. You can also customize the site URL.
In this post, we will show the step-by-step process of deploying a hugo site with netlify.
Add Netlify Configuration
At first, create a netlify.toml file at the root of your repository and add the following configuration there:
[build]
command = "hugo --gc --minify"
publish = "public"

[context.production.environment]
HUGO_ENABLEGITINFO = "true"
HUGO_ENV           = "production"
HUGO_VERSION       = "0.120.1"
NODE_VERSION       = "v18.12.1"
NPM_VERSION        = "8.19.2"

[context.split1]
command = "hugo mod tidy && hugo mod npm pack && npm install && hugo --gc --minify --enableGitInfo"

    [context.split1.environment]
    HUGO_ENV     = "production"
    HUGO_VERSION = "0.120.1"
    NODE_VERSION = "v18.12.1"
    NPM_VERSION  = "8.19.2"

[context.deploy-preview]
command = "hugo mod tidy && hugo mod npm pack && npm install && hugo --gc --minify --buildFuture -b $DEPLOY_PRIME_URL"

    [context.deploy-preview.environment]
    HUGO_VERSION = "0.120.1"
    NODE_VERSION = "v18.12.1"
    NPM_VERSION  = "8.19.2"

[context.branch-deploy]
command = "hugo mod tidy && hugo mod npm pack && npm install && hugo --gc --minify -b $DEPLOY_PRIME_URL"

    [context.branch-deploy.environment]
    HUGO_VERSION = "0.120.1"
    NODE_VERSION = "v18.12.1"
    NPM_VERSION  = "8.19.2"

[context.next.environment]
HUGO_ENABLEGITINFO = "true"
Commit and push the netlify.toml file into Github. Now, you are ready to deploy your site with netlify.
Deploy Site
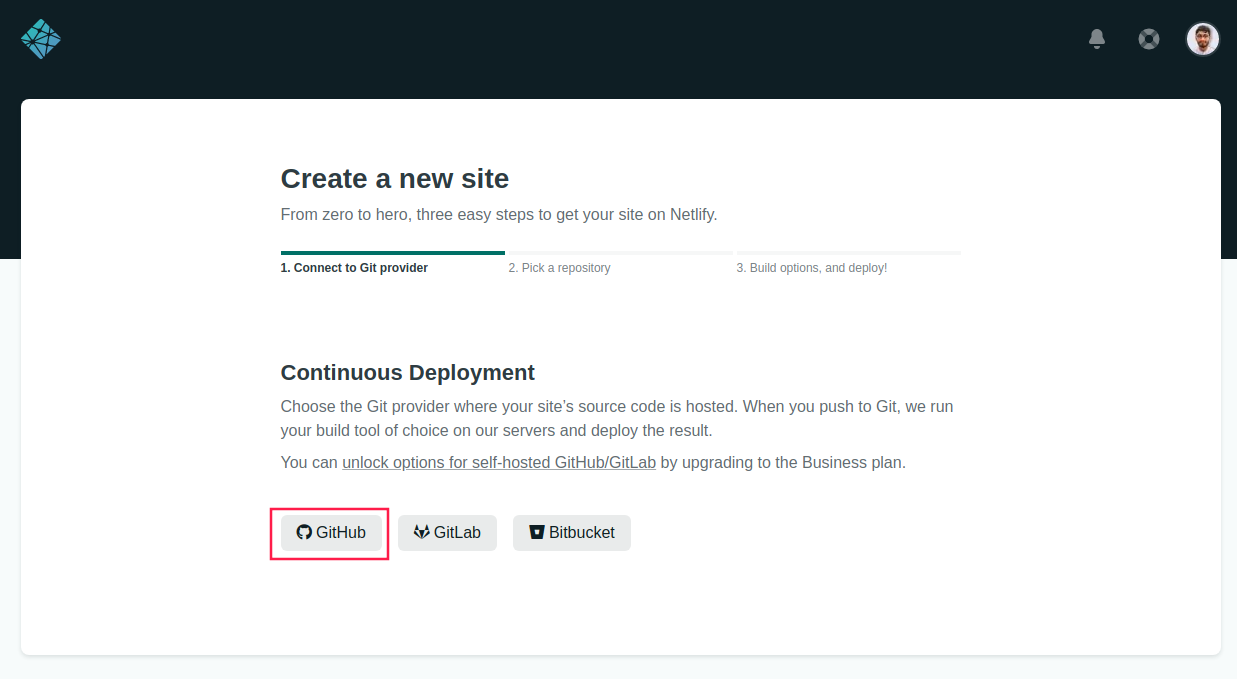
Now, login into netlify. Then, go to Sites tab of your netlify dashboard and click New site form Git button.

A new popup will open. Select Github and authenticate, with your Github account.
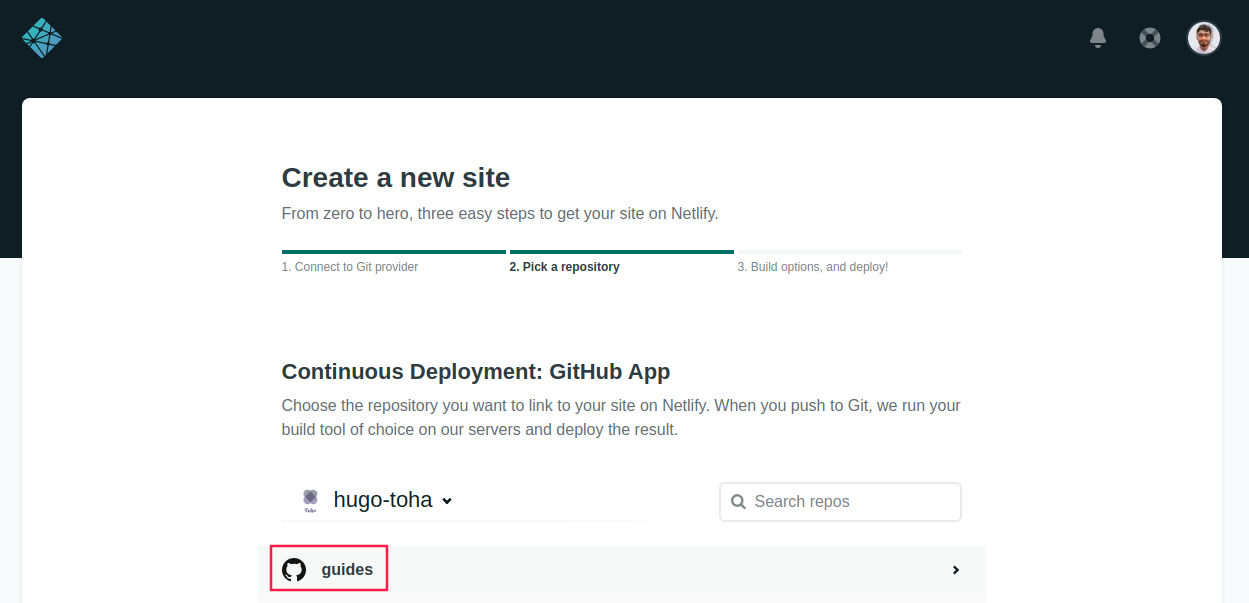
After authenticating, it will ask to select your desired repository. Select the repository you are using for your site.
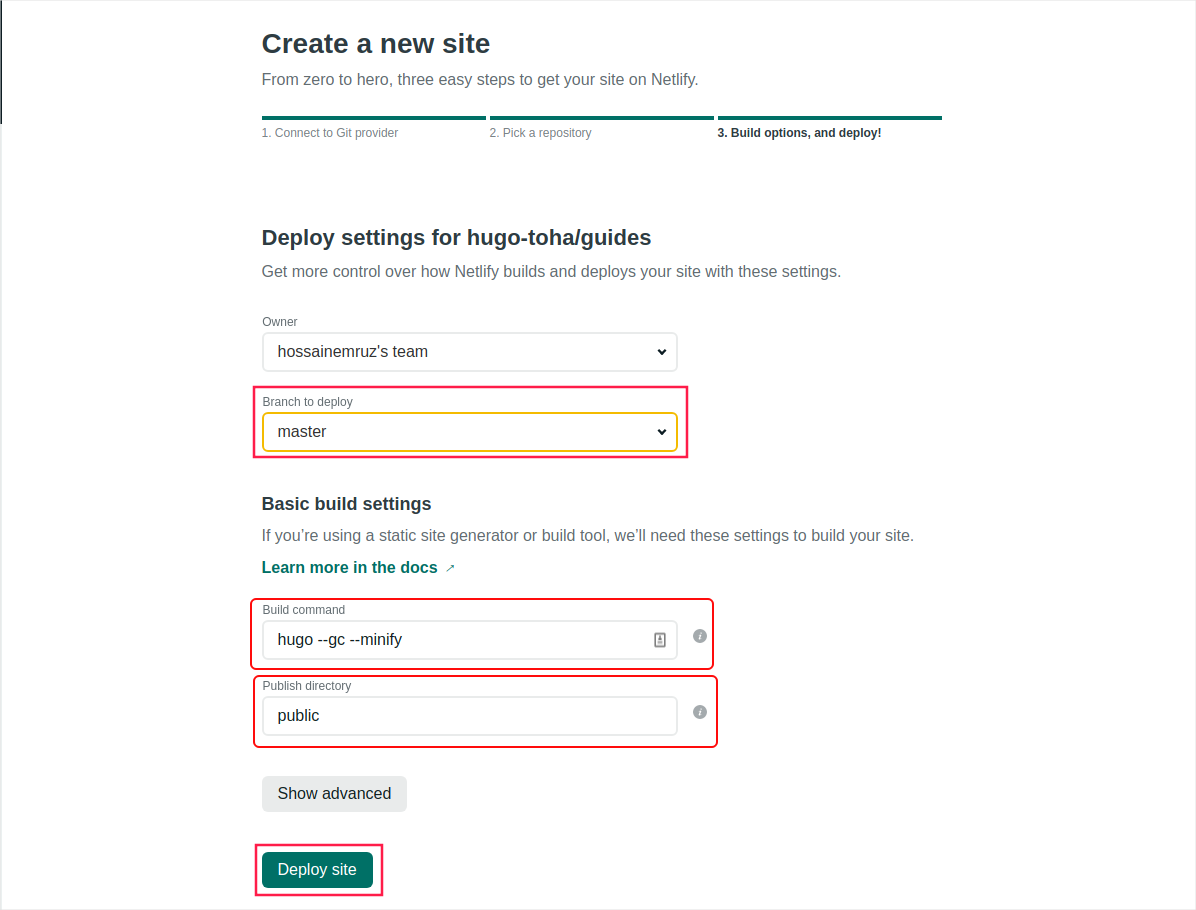
Now, netlify will take you to the deployment page. Select the branch you want to deploy. Netlify should automatically populate the required fields from the netlify.toml file you created earlier in this post. When you are satisfied with the configurations, press the Deploy button.
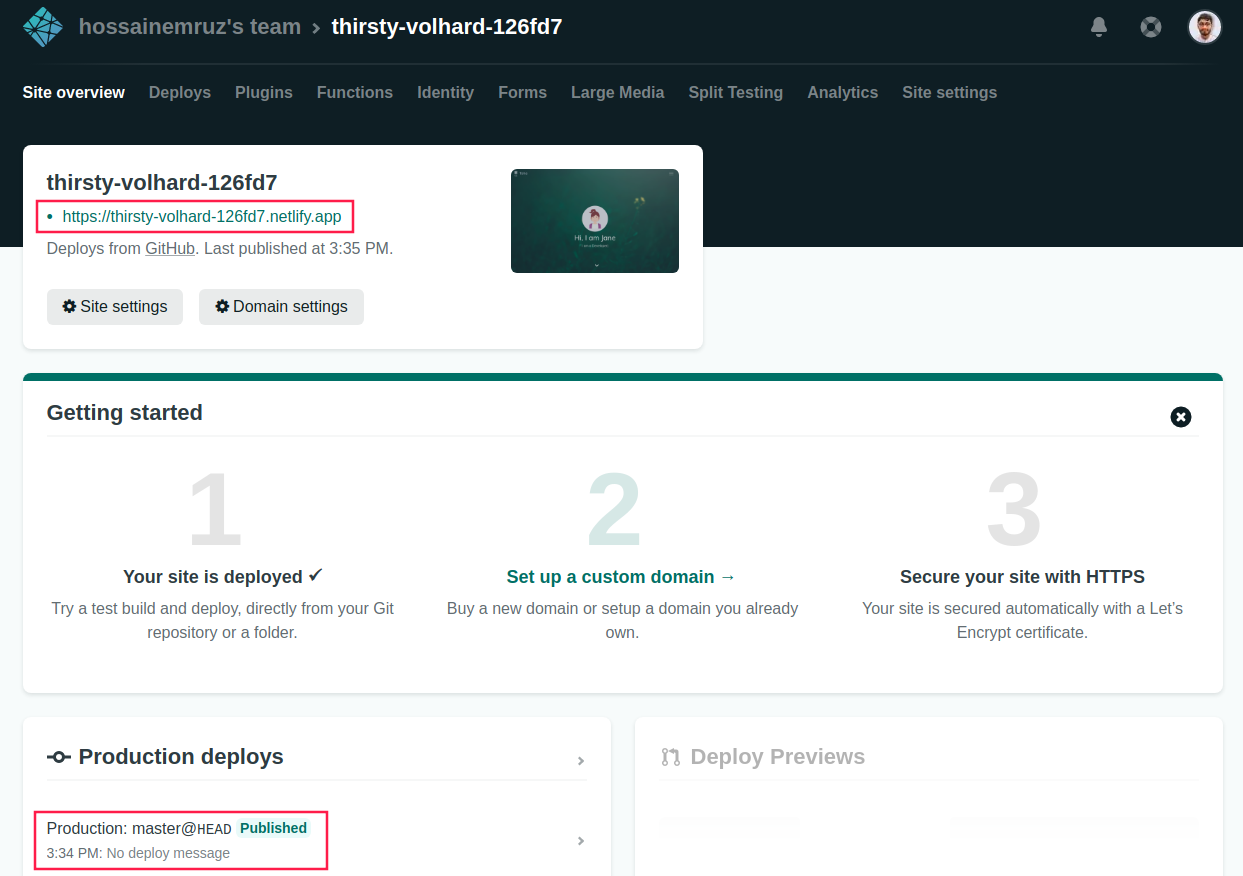
Now, netlify will start publishing your site immediately. Wait for the publishing process to complete. Once, the site has been published, you can browse your site at the URL automatically generated by netlify. The auto-generated URL has been pointed out by a red rectangle in the screenshot below.
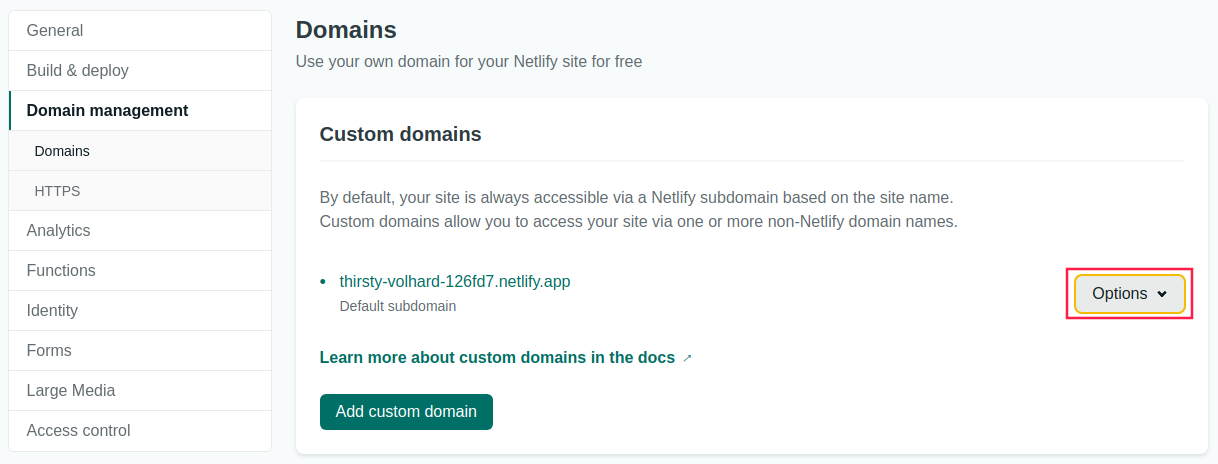
Customize URL
You can easily customize the URL of your site with just few clicks as shown below.
- Click the
Domain Settingbutton underSite Overviewtab.

- Now, you can either add your own domain by clicking on
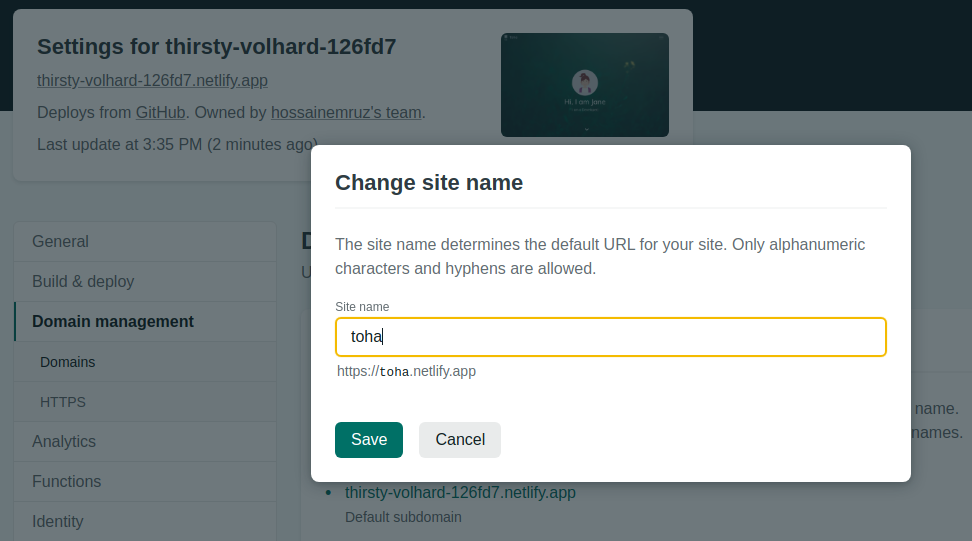
Add custom domainbutton or you can just use<your custom prefix>.netlify.appdomain. Here, we are going with the later. Click theoptionsdropdown and selectEdit site name.
- Then, give your site whatever name you want.
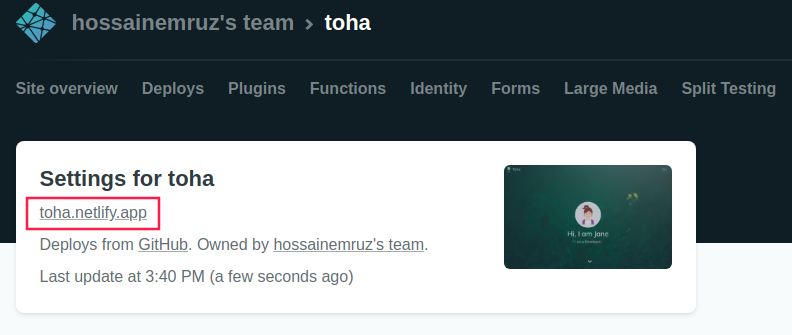
- Once you have saved the new name, you will see the URL of your site has been updated instantly. Now, you can browse your site at the new URL.
comments powered by Disqus