
John Doe
Monday, June 8, 2020 | 3 minutes
Deploy site in Github Pages
In this post, we are going to deploy the site we have created in previous post in Github Pages. At first, make sure that your repository name is <your username>.github.io. Then, commit any local uncommitted changes and push into Github.
Create gh-pages Branch
At first, create a new branch named gh-pages. Github will automatically set respective configurations for Github Pages when it see a branch with this name.
# create the gh-pages branch
$ git checkout -b gh-pages
# push the source branch into Github
$ git push gh-pages gh-pages
Enable Github Action
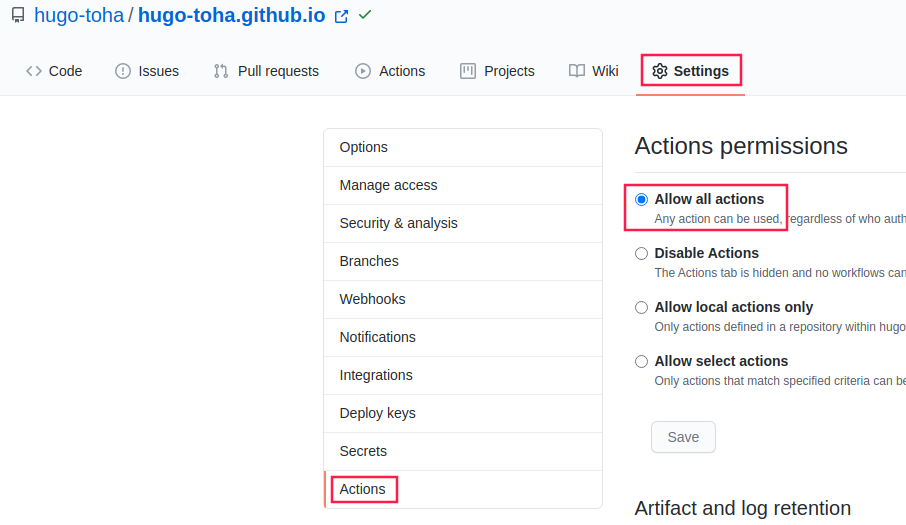
We are going to automate the deploying process using Github Actions. At first, make sure that Github Action is enabled in your repository. Go to Settings > Actions of your repository and make sure Action permissions is set to Allow all actions. Here, is a screenshot of the respective setting:
Add Workflow
We are going to use peaceiris/actions-hugo action to set up hugo and peaceiris/actions-gh-pages to deploy the site. Create .github folder at the root of your repository. Then, create workflows folder inside the .github folder. Finally, create a deploy-site.yaml file inside the workflows folder and add the following content there:
name: Deploy to Github Pages

# run when a commit is pushed to "source" branch
on:
  push:
    branches:
    - main

jobs:
  deploy:
    runs-on: ubuntu-latest
    steps:
    # checkout to the commit that has been pushed
    - uses: actions/checkout@v4

    - name: Setup Hugo
      uses: peaceiris/actions-hugo@v3
      with:
        hugo-version: 'latest'
        extended: true

    - name: Update Hugo Modules
      run: hugo mod tidy

    - name: Setup Node
      uses: actions/setup-node@v4
      with:
        node-version: 20

    - name: Install node modules
      run: |
        hugo mod npm pack
        npm install

    - name: Build
      run: hugo --minify

    # push the generated content into the `gh-pages` branch.
    - name: Deploy
      uses: peaceiris/actions-gh-pages@v4
      with:
        github_token: ${{ secrets.GITHUB_TOKEN }}
        publish_branch: gh-pages
        publish_dir: ./public
This action will start on every push into the main branch. It will build the site and commit the generated content into gh-pages branch.
Deploy
If you have followed the guide properly, your site should be ready to deploy in Github Pages. Now, if you push any commit into your main branch, a Github Action will start and deploy your site automatically.
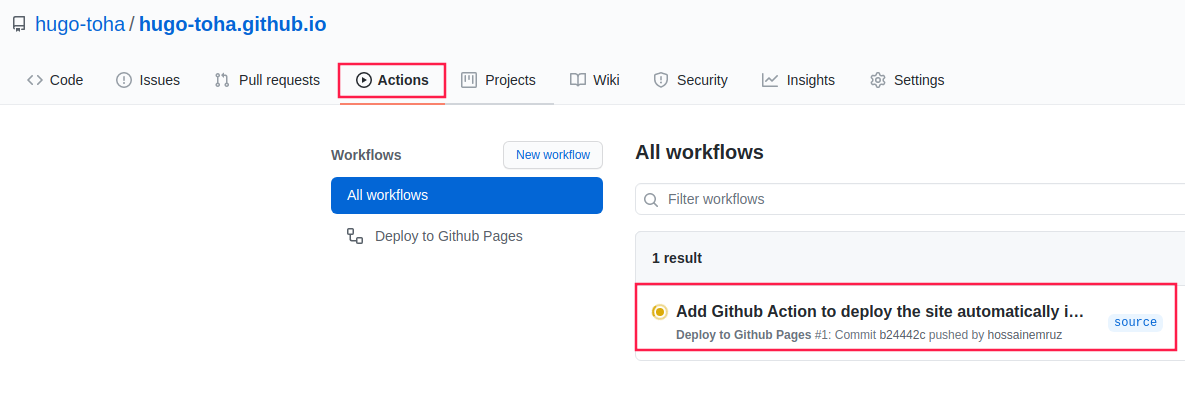
Push a commit into the main branch and go to Actions tab of your repository to verify that the action has started.
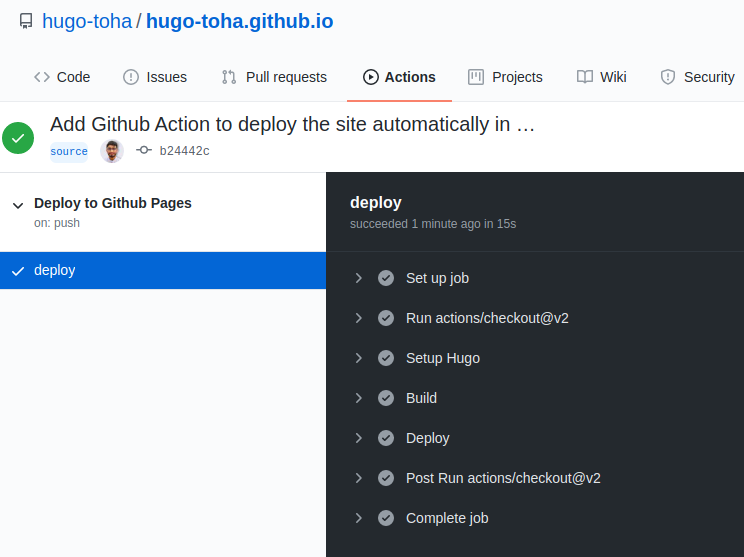
Now, wait for the actions to complete. If it completes successfully, you should see a green tick indicating successful run.
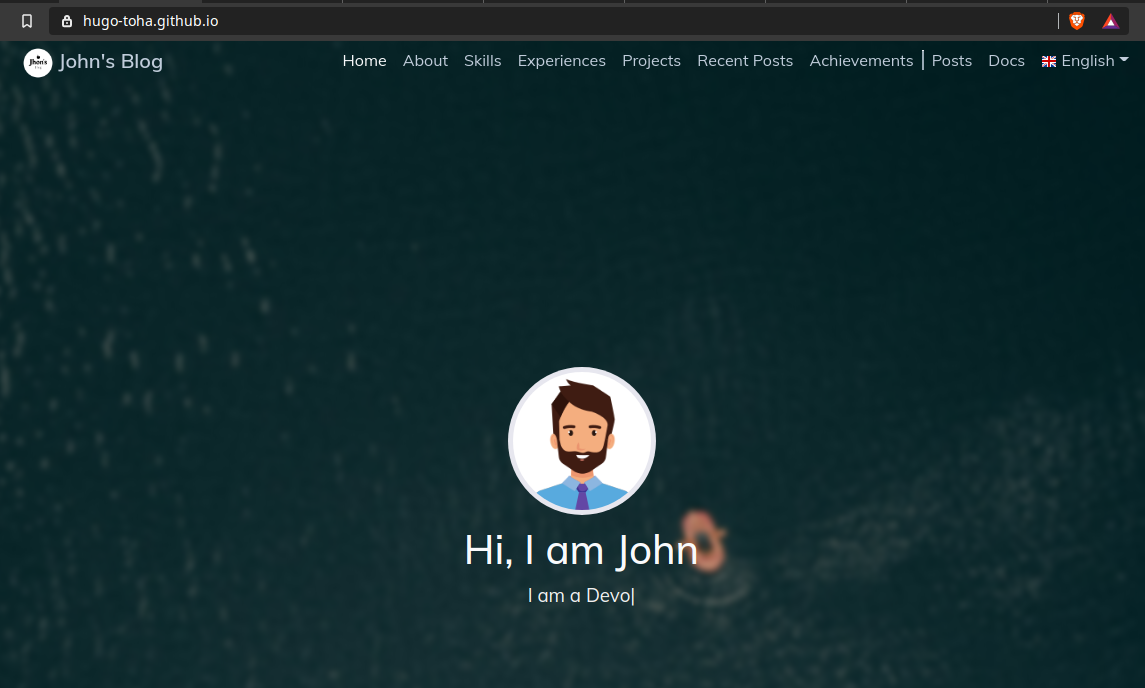
Once the Github Action has completed successfully, you can browse your site at https://<your username>.github.io.
Add custom domain name
If you own a domain name and willing to use it in this website go to your domain name provider website. Then add the following Resource Records:
@      3600    IN A     185.199.108.153
@      3600    IN A     185.199.109.153
@      3600    IN A     185.199.110.153
@      3600    IN A     185.199.111.153

WWW    3600    IN A     185.199.108.153
WWW    3600    IN A     185.199.109.153
WWW    3600    IN A     185.199.110.153
WWW    3600    IN A     185.199.111.153
To verify your domain to make sure nobody from Github can claim it except from you, you can follow the steps contained in this guide.
Finally create a CNAME file inside /static directory of your repository. Add your domain name there:
example.com
Once the Github Action has completed successfully, you can browse your site at https://<your domain name>.
Note that by browsing to https://<your username>.github.io it will automaitcally redirect to https://<your domain name>.
comments powered by Disqus